Meet my latest Finish Object (FO), the lovely, Ellerbe Cowl, designed by Melissa Stajda. The pattern was released on the first day of Fall, and the knit-a-long (KAL) is going until the end of October.
Showing posts with label beginner. Show all posts
Wednesday, October 14, 2015
FO | Ellerbe Cowl
Labels:
beginner,
beginner knitting,
cowl,
instagram,
KAL,
knitting,
learn to knit,
pattern,
pattern review,
revelry,
review
Thursday, September 24, 2015
Coming Up
Hello, folks! Life has been crazy busy, and isn't about to slow down anytime soon... but hopefully my day job will wind down in the next month or so, and I will have more time for my personal projects!
Some of those projects include you guys! I really want to get down some patterns that I've been working on, as well as a few more tutorials for YouTube - I can't wait to share them with you guys! I've also started using Periscope, and I really like it! Right now it's just WIP updates, but I also hope to provide help and tips, too, so keep and eye out!
In the meantime, I've been dreaming up a learn-to-knit series, using wash cloths to build skills. I will be doing washcloths because they are small, quick, and useful. Because they complete quickly, the new knitter will be able to move on to their own projects sooner than if they learned on a scarf or cowl. I would love to teach the series in person, but I will probably do it through YouTube, first, and see where it goes from there.
Some of those projects include you guys! I really want to get down some patterns that I've been working on, as well as a few more tutorials for YouTube - I can't wait to share them with you guys! I've also started using Periscope, and I really like it! Right now it's just WIP updates, but I also hope to provide help and tips, too, so keep and eye out!
In the meantime, I've been dreaming up a learn-to-knit series, using wash cloths to build skills. I will be doing washcloths because they are small, quick, and useful. Because they complete quickly, the new knitter will be able to move on to their own projects sooner than if they learned on a scarf or cowl. I would love to teach the series in person, but I will probably do it through YouTube, first, and see where it goes from there.
Sunday, December 14, 2014
Pattern | Simple Cup Cozy (and color work)
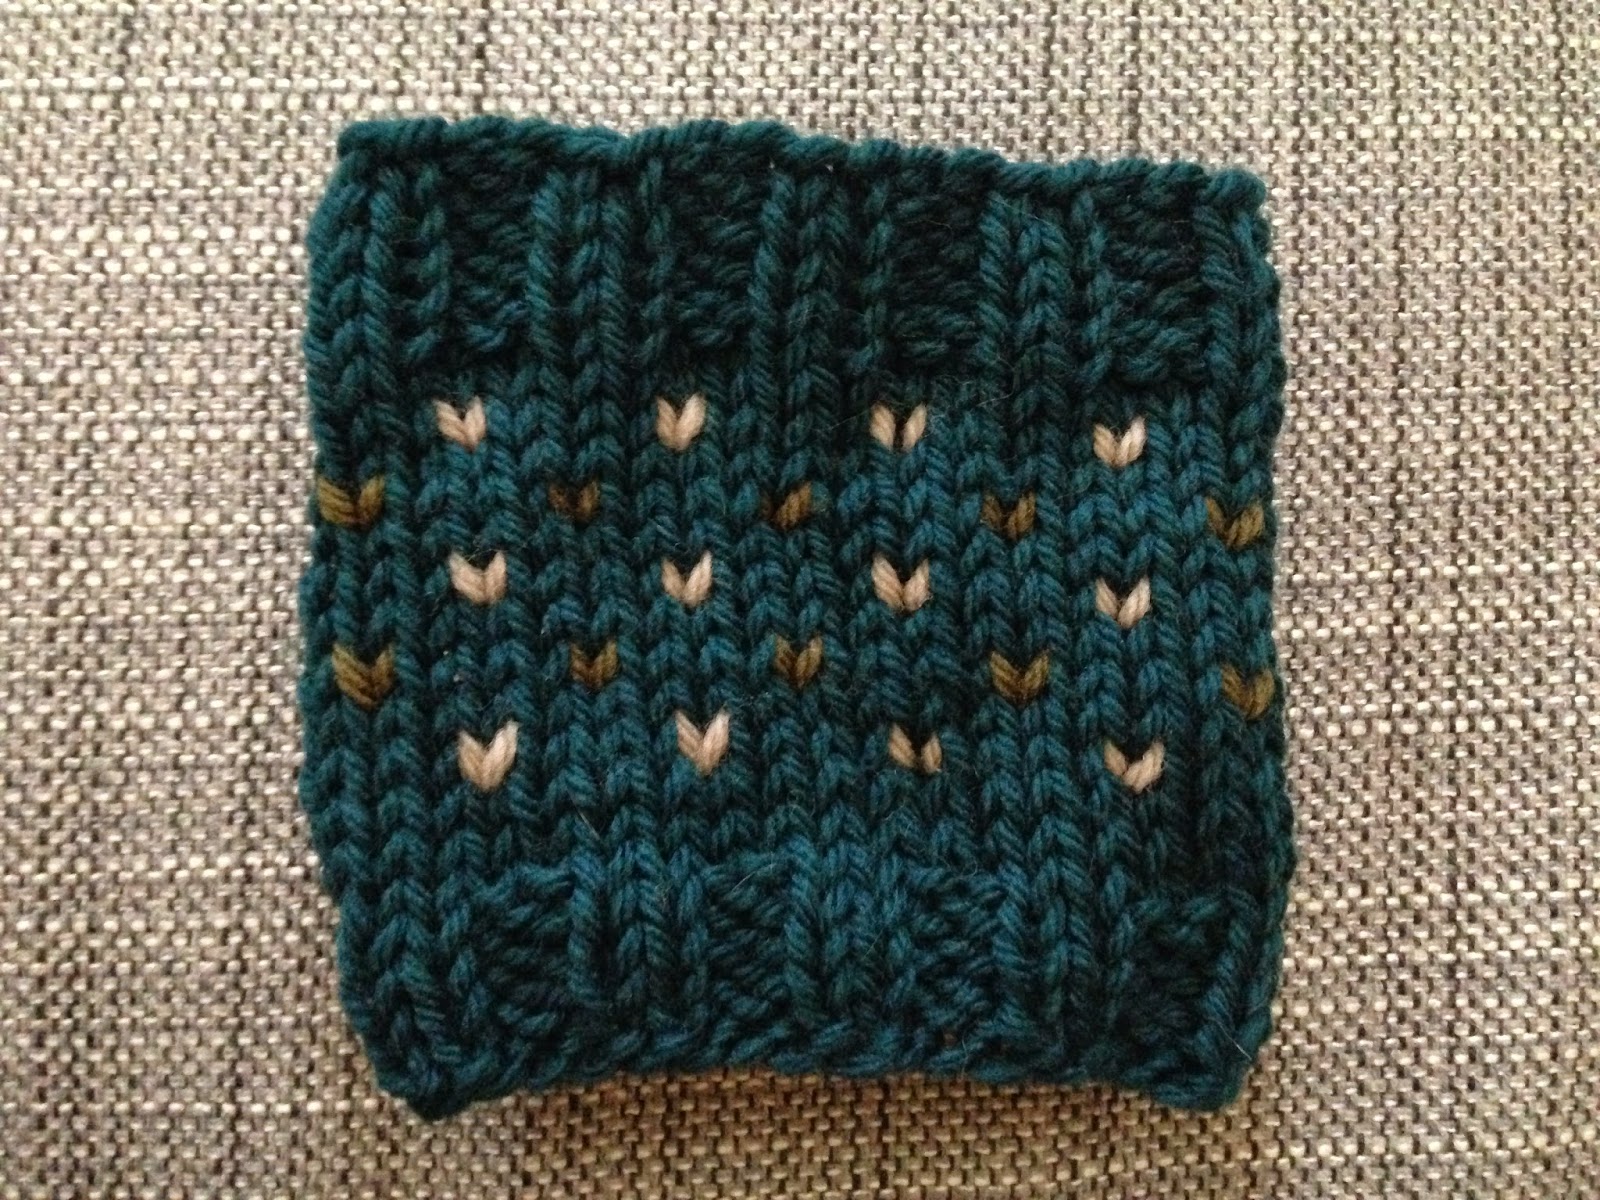
A while back I posted the pattern and tutorial for my Dimple Stripe Cup Cozy. Earlier this year I started to make more basic cup cozies so that they could be modified with embroidery and color work, and be a bit less feminine. I've been walking around with my first one (not pictured) for a while now, and this weekend I got stopped by two women that wanted to know how to make it - this was a sign that it's time to update the blog with this particular pattern. So here it is, another free cup cozy pattern and tutorial!
| I love how the knitted 'v' looks like a heart |
These make really great little gifts, and are also great stash busters! They fit on regular coffee shop cups, as well as slim personal cups and travel mugs.
Friday, November 28, 2014
Pattern | Knitted Simple Slouchy Hat
Last year I posted my free pattern for a crocheted Simple Slouchy Beanie. Since then, I have been playing around with knitting and wanted to offer another simple project, a knitted slouchy hat.
Though I learned how to knit over ten years ago, I stuck with very basic stuff because knitting in the round scared me... DPNs and circular needles can be intimidating. But, I plowed through that fear and plunged into hat making, and I am so glad that I did!
| S/M hat on the left, and M/L hat on the right. |
Labels:
beanie,
beginner,
beginner knitting,
free pattern,
hat,
knitting,
learn to knit,
pattern,
slouchy beanie,
slouchy hat,
tutorial
Friday, November 21, 2014
Mini Tuto and Pattern | Knitted Seed Stitch Cowl (with video!)
Sometimes the really simple things are the best. I recently cast on this seed stitch cowl, and I love the way it's working up! Seed stitch cowls are very easy to make. This one is in the round, which makes it even easier, and it requires only one 100g* ball of yarn!
I'm about half way through the project right now - I've been alternating between this and two hats on the train ride to and from work - and it seems like it will be just right when it's done.
This project is great for a beginner! You just need to know how to knit and purl - working in the round is fairly easy, and there are plenty of YouTube tutorials to help you start off right. At the bottom of this post I have my own little video for seed stitch in the round!
Labels:
beginner,
free pattern,
knitting,
learn to knit,
pattern,
seed stitch,
simple,
tutorial
Wednesday, November 19, 2014
Tutorial | Simple, Old Fashioned Slippers
| (pardon the slipper that's stretched out...) |
I went to Ravelry, typed in my search, specified that I wanted something knitted with worsted weight yarn, and free. What I saw depended that feeling of nostalgia: slippers that looked like the ones my great-grandma used to make. She would make slippers for the whole family at Christmas, always adding little pom-poms to the girls slippers, or sometimes a crocheted flower. I could almost taste her sugar cookies while I was looking at the pattern photos. She passed when I was seven or eight, and I was so sad when my last pair of slippers wore out - they were a bright, Christmas red with a pom-pom on each one.
Saturday, November 1, 2014
Revisiting the Yarn Over (YO)
I recently started working on a beautiful, open-work cowl. The pattern is called A Nobel Cowl, by Emily Kausalik, and is published for free on Ravelry. It has the most beautiful shield pattern, and I knew it would be perfect for the the Classic Elite Lush that I had picked up over at Article Pract (which is sadly closing within the year). It also looked fairly easy to make, though it was marked intermediate*.
I knew (or thought I knew) how to do most of the stitches, and just went to YouTube to learn how to ssk, or slip-slip-knit, a decrease stitch. I was confident enough in my ability to perform the k2tog and yo to get started without much hesitation.
The pattern states that it is in sets of fifteen. Having only one skein of yarn, I decided to reduce the number of stitches to 105, and make mine a bit shorter. I got started, but noticed that I was working in sets of nineteen, and that by the time I made it to the end, I was only able to get ten of the last set of "fifteen" in... I reached out (kind of... more like complained on Instagram), and was told that the pattern was indeed worked in sets of fifteen stitches, not the nineteen that I was getting. I was completely perplexed, but just kept going for the full twenty-eight rows of the pattern, only to see this mutant looking merger where the whole patter meets half a pattern. You can imagine my disappointment, confusion, and frustration.
Labels:
beginner,
free pattern,
howto,
Ravelry,
tutorial
Thursday, March 28, 2013
Tutorial Thursday: Spring Cleaning Scrubby
Hello! Welcome to Tutorial
So to start with, you can clean out the stash AND clean the house with these lovely scrubbies! One in knit, the other in crochet, depending on your preference. Now you have an excuse to go for the yarn stash before scrubbing!
Labels:
beginner,
charity,
crochet,
crocheting,
diy,
free,
gift,
how-to,
Knit,
knitting,
pattern,
seed stitch,
simple,
spring cleaning,
themadewithloveproject,
tutorial,
tutorial tuesday,
tutorials,
yarn,
yarn stash
Tuesday, March 5, 2013
Tuetorial Tuesday: Simple Slouchy Beanie
It's been a while since I have posted a tutorial, and I had recently promised one on a seed-stitch cup cozy. Well, I used that cozy today and it was too big for a standard paper coffee cup. It fit around, but it would slide, and eventually stretched a bit and fell off when I set the cup down... So, I finished this post instead, which has been pending and unfinished for a while now...
Some of you may remember my post on Instagram several weeks ago with a beanie pattern I came up with. I was inspired by this video on making your joining stitches in double-crochet in the round nearly invisible - I was quite interested in this as I had just made a number of beanies for Christmas and was not really pleased with the gap at joining. So, here is the result of my experiment:
The Simple Slouchy Beanie uses double crochet, single crochet, and slip stitch, in the round. There are increases and decreases, but nothing fancy.
Labels:
basic beanie,
beanie,
beginner,
crochet,
crocheting,
diy,
double crochet,
instagram,
pattern,
simple,
tutorial,
tutorial tuesday,
tutorials,
yarn
Tuesday, November 13, 2012
Tutorial Tuesday: the simple cowl
I am proud to offer you an original pattern and tutorial this week!
It turns out that I have become rather hooked on crochet! I ended up watching a number of tutorials on YouTube recently and I got inspired to try my hand at making a cowl.
To get an idea for size I wrapped one of my scarves around my neck to see how long I would like it. Then I took it off and grabbed my measuring tape - it was somewhere in the area of 30"-36". As I was making the chain I checked the length along the way by wrapping it around my neck. I started off with a 6.5mm hook and two strands of worsted weight yarn, but it was much too stiff! So, I unraveled, scoured the internet for other cowl patterns and found that a 10mm hook is ideal when using two strands of yarn, and I happened to have a 10mm hook on hand! So I started up again and it turned out great!
The pattern uses the following stitches:
SS (slip stitch)
SC (single crochet)
HDC (half double crochet)
DC (double crochet)
Matterials*:
1 skein* of Loops & Threads Impeccable yarn (Michael's brand)
(note: I just made this with Caron Simply Soft and I love it!)
1 10mm crochet hook
1 stitch marker*
1 large-eye yarn needle
Tape measure
Scissors
Method:
Using two strands of yarn at the same time, the outside and inside strands, make a chain that is approx. 32" (or desired length) and join with a SS, taking care not to twist your chain.
Row 1. SC into each chain, marking the final stitch with your stitch marker.
Row 2. Chain one (don't turn, you are working in the round) and HDC for the entire row. Mark your final stitch. SS to join to the beginning of your row.
Row 3. Chain 2 and DC into every stitch. Mark your final stitch. SS to join to the beginning of your row.
Row 4. Chain 1 and HDC into every stitch. Mark your final stitch. SS to join to the beginning of your row.
Row 5. Same as 3
Rows 6-10. Continue alternating between HDC and DC, as in the rows 4 (HDC) and 3 (DC), ending with the HDC.
Row 11. SC into each stitch, marking your final stitch. You will not need to "join."
Row 12. SS into each stitch around, taking care not to make the stitches too tight. Bind off, leaving a tail, pull tight and sew in the tail.
Tighten the tail from the slip knot where you began and sew in the tail.
Your finished product should be about 18" flat, 36" around, and about 7" tall.
* 1 skein refers to the solid color ball with 277 yards of yarn - other styles of Impeccable have fewer yards of yarn. If you us a different yarn you might need more than one skein (i.e. Vanna's Choice is only 145 yds., so you would need two skeins). UPDATE: I just made a cowl with Caron Simply Soft and I LOVE IT - it has such a nice weight to it, and the yarn is set up for pulling from the outside and the inside for convenience. It also has more yardage than Impeccable, so you can make the cowl a bit taller if you like. For a stitch marker I typically use a paperclip, but in the pictures above I just used a strand from the tail. You can use a piece of yarn in a different color, a safety pin... whatever you have.
You could also make this 60"+ so that you can wrap it twice. And you might want to try stacking stitches rather than doing every-other, or throw in some single-crochets, or maybe even the treble stitch. Have fun with it!
If you have any questions regarding the pattern, please leave a comment or send me an email at TheMadeWithLoveProject {at} gmail {dot} com.
If you try this pattern I would love to see the pictures! Tag me on Instagram or share a link in the comments. Thanks!
Enjoy!
It turns out that I have become rather hooked on crochet! I ended up watching a number of tutorials on YouTube recently and I got inspired to try my hand at making a cowl.
To get an idea for size I wrapped one of my scarves around my neck to see how long I would like it. Then I took it off and grabbed my measuring tape - it was somewhere in the area of 30"-36". As I was making the chain I checked the length along the way by wrapping it around my neck. I started off with a 6.5mm hook and two strands of worsted weight yarn, but it was much too stiff! So, I unraveled, scoured the internet for other cowl patterns and found that a 10mm hook is ideal when using two strands of yarn, and I happened to have a 10mm hook on hand! So I started up again and it turned out great!
The pattern uses the following stitches:
SS (slip stitch)
SC (single crochet)
HDC (half double crochet)
DC (double crochet)
Matterials*:
1 skein* of Loops & Threads Impeccable yarn (Michael's brand)
(note: I just made this with Caron Simply Soft and I love it!)
1 10mm crochet hook
1 stitch marker*
1 large-eye yarn needle
Tape measure
Scissors
Method:
Row 1. SC into each chain, marking the final stitch with your stitch marker.
Row 2. Chain one (don't turn, you are working in the round) and HDC for the entire row. Mark your final stitch. SS to join to the beginning of your row.
Row 3. Chain 2 and DC into every stitch. Mark your final stitch. SS to join to the beginning of your row.
Row 4. Chain 1 and HDC into every stitch. Mark your final stitch. SS to join to the beginning of your row.
Row 5. Same as 3
Rows 6-10. Continue alternating between HDC and DC, as in the rows 4 (HDC) and 3 (DC), ending with the HDC.
Row 11. SC into each stitch, marking your final stitch. You will not need to "join."
Row 12. SS into each stitch around, taking care not to make the stitches too tight. Bind off, leaving a tail, pull tight and sew in the tail.
Tighten the tail from the slip knot where you began and sew in the tail.
Your finished product should be about 18" flat, 36" around, and about 7" tall.
* 1 skein refers to the solid color ball with 277 yards of yarn - other styles of Impeccable have fewer yards of yarn. If you us a different yarn you might need more than one skein (i.e. Vanna's Choice is only 145 yds., so you would need two skeins). UPDATE: I just made a cowl with Caron Simply Soft and I LOVE IT - it has such a nice weight to it, and the yarn is set up for pulling from the outside and the inside for convenience. It also has more yardage than Impeccable, so you can make the cowl a bit taller if you like. For a stitch marker I typically use a paperclip, but in the pictures above I just used a strand from the tail. You can use a piece of yarn in a different color, a safety pin... whatever you have.
You could also make this 60"+ so that you can wrap it twice. And you might want to try stacking stitches rather than doing every-other, or throw in some single-crochets, or maybe even the treble stitch. Have fun with it!
If you have any questions regarding the pattern, please leave a comment or send me an email at TheMadeWithLoveProject {at} gmail {dot} com.
If you try this pattern I would love to see the pictures! Tag me on Instagram or share a link in the comments. Thanks!
Enjoy!
Tuesday, October 30, 2012
Tutorial Tuesday: beanies for breast cancer
Hello!
I know that I promised an original knit hat pattern, but alas, I am in the process of moving and writing a ton of papers, so it will have to wait until November. But I do have a cute hat pattern from the blog Grow Creative for you (make sure to check out the rest of her blog)!
It is a lovely shell-pattern that is not too difficult to manage, even for a beginner. I wouldn't suggest this for a first project, but if you have done a project in the round and/or know how to do a double crochet stitch, you can manage this! I say this because I am a beginner and mine is coming along just fine! But, if you find that the shells are too challenging, you can go ahead and finish it off with double-crochet stitches.
You can find the pattern right here. I am sure she would love to know if you try it out, and I know I would love to hear about it too!
Here are a couple pictures of my progress, and some notes to help you through the shell stitches if this is your first try (I will apologize now for the varying color quality - these were all taken with my phone, some at night with nasty CFL lighting, and some during the day with natural light...)
So, here is just the double crochet bit - this part is fairly easy, the only thing that might be confusing for a beginner is the joining of the stitches at the end of the round.
A note on the first round of shells: I ended up starting them in too close to my beginning chain, so if I were you, I would do what I did after I had to take all of my stitches out - count through your stitches the same way you will be putting the stitches in, i.e. one, two, five, one, two, one, one, two, five, etc... so that you can see where you will end. It will save you from possible frustration.
Here is a close-up of putting in the second row of shells.
At first I was concerned that it would be really difficult to put in the next round, but you are really just stacking the rows, with the short in-between stitches on top of a shell and the shells over the in-between stitches. You almost don't need to count...
That is as far as I have made it through the pattern so far, but I will update the post once I am finished.
And finally, some notes on my materials:
I used a metal Boyle hook in the recommended size, 5mm (I prefer metal to plastic).
I used Vanna's Choice yarn in pink. This yarn tends to split a little, which can slow things down, but I do love the colors they offer...
Well, that is all that I have to say about this project/pattern.
Hope you enjoy this lovely pattern!
Stephanie
MWLP
I know that I promised an original knit hat pattern, but alas, I am in the process of moving and writing a ton of papers, so it will have to wait until November. But I do have a cute hat pattern from the blog Grow Creative for you (make sure to check out the rest of her blog)!
| Photo from GrowCreative.blogspot.com |
It is a lovely shell-pattern that is not too difficult to manage, even for a beginner. I wouldn't suggest this for a first project, but if you have done a project in the round and/or know how to do a double crochet stitch, you can manage this! I say this because I am a beginner and mine is coming along just fine! But, if you find that the shells are too challenging, you can go ahead and finish it off with double-crochet stitches.
You can find the pattern right here. I am sure she would love to know if you try it out, and I know I would love to hear about it too!
Here are a couple pictures of my progress, and some notes to help you through the shell stitches if this is your first try (I will apologize now for the varying color quality - these were all taken with my phone, some at night with nasty CFL lighting, and some during the day with natural light...)
So, here is just the double crochet bit - this part is fairly easy, the only thing that might be confusing for a beginner is the joining of the stitches at the end of the round.
A note on the first round of shells: I ended up starting them in too close to my beginning chain, so if I were you, I would do what I did after I had to take all of my stitches out - count through your stitches the same way you will be putting the stitches in, i.e. one, two, five, one, two, one, one, two, five, etc... so that you can see where you will end. It will save you from possible frustration.
| first round of shells |
Here is a close-up of putting in the second row of shells.
| beginning of second round of shells |
| two rows of shells |
That is as far as I have made it through the pattern so far, but I will update the post once I am finished.
And finally, some notes on my materials:
I used a metal Boyle hook in the recommended size, 5mm (I prefer metal to plastic).
I used Vanna's Choice yarn in pink. This yarn tends to split a little, which can slow things down, but I do love the colors they offer...
Well, that is all that I have to say about this project/pattern.
Hope you enjoy this lovely pattern!
Stephanie
MWLP
Subscribe to:
Posts (Atom)